Saturday, 1 December 2012

Little Baby Hippo


This pattern is from one of my favorite craft sites. Its called http://crochetnplay.blogspot.ca/
I hope you go to her site and see what other patterns she has. She makes them all herself and has many free ones and a few bigger patterns that you have to buy.

Materials:
Crochet hook size E/4.00
Worsted weight acrylic yarn in baby blue and white (or two other colors of your choice)
Small amount of brown felt for eyes
Small amount of brown and white embroidery floss for eyes and nostrils
Sewing needle
Tapestry/ yarn needle
Polyester stuffing
You’ll need to know how to do these stitches:
Chain (ch)
Double loop start
Single crochet (sc)
Single crochet together/ decrease (sc2tog)
Slip stitch (sl st)

Head:
With baby blue yarn
Rnd 1: 6 sc into a double loop start and pull the loop closed (6).
Rnd 2: 2 sc in each sc around (12).
Rnd 3: [Sc in next sc, 2 sc in next sc] 6 times (18).
Rnd 4: [Sc in next 2 sc, 2 sc in next sc] 6 times (24).
Rnd 5: [Sc in next 3 sc, 2 sc in next sc] 6 times (30).
Rnd 6: [Sc in next 4 sc, 2 sc in next sc] 6 times (36).
Rnd 7: [Sc in next 5 sc, 2 sc in next sc] 6 times (42).
Rnd 8: [Sc in next 6 sc, 2 sc in next sc] 6 times (48).
Rnd 9: [Sc in next 7 sc, 2 sc in next sc] 6 times (54).
Rnd 10: sc in each sc around (54).
Rnd 11: [Sc in next 8 sc, 2 sc in next sc] 6 times (60).
Rnds 12-13: sc in each sc around (60).
Rnd 14: [Sc in next 8 sc, sc2tog] 6 times (54).
Rnd 15: sc in each sc around (54).
Rnd 16: [Sc in next 7 sc, sc2tog] 6 times (48).
Rnd 17: [Sc in next 6 sc, sc2tog] 6 times (42).
Rnd 18: [Sc in next 5 sc, sc2tog] 6 times (36).
Rnd 19: [Sc in next 4 sc, sc2tog] 6 times (30).
Rnd 20: [Sc in next 3 sc, sc2tog] 6 times (24).
Rnd 21: [Sc in next 2 sc, sc2tog] 6 times (18).
Finish off, leaving a 12” tail for sewing.

Body:
With baby blue yarn
Rnd 1: 6 sc into a double loop start and pull the loop closed (6).
Rnd 2: 2 sc in each sc around (12).
Rnd 3: [Sc in next sc, 2 sc in next sc] 6 times (18).
Rnd 4: [Sc in next 2 sc, 2 sc in next sc] 6 times (24).
Rnd 5: [Sc in next 3 sc, 2 sc in next sc] 6 times (30).
Rnd 6: [Sc in next 4 sc, 2 sc in next sc] 6 times (36).
Rnd 7: [Sc in next 5 sc, 2 sc in next sc] 6 times (42).
Rnd 8: [Sc in next 6 sc, 2 sc in next sc] 6 times (48).
Rnds 9-10: sc in each sc around (48).
Rnd 11: [Sc in next 7 sc, 2 sc in next sc] 6 times (54).
Rnds 12-16: sc in each sc around (54).
Rnd 17: [sc in next 7 sc, sc2tog] 6 times (48).
Rnd 18: sc in each sc around (48).
Rnd 19: [sc in next 6 sc, sc2tog] 6 times (42).
Rnd 20: sc in each sc around (42).
Rnd 21: [sc in next 5 sc, sc2tog] 6 times (36).
Rnd 22: sc in each sc around (36).
Rnd 23: [sc in next 4 sc, sc2tog] 6 times (30).
Rnd 24: [sc in the next 13, sc2tog] 2 times (28).
Rnd 25: [sc in the next 12, sc2tog] 2 times (26).
Rnd 26: [sc in the next 11, sc2tog] 2 times (24).
Rnd 27: [sc in the next 10, sc2tog] 2 times (22).
Rnd 28: sc in each sc around (22).
Rnd 29: [sc in the next 9, sc2tog] 2 times (20).
Rnd 30: [sc in the next 8, sc2tog] 2 times (18).
Finish off and secure end. Stuff head and body firmly with polyfil and sew head to body.

Arms: make 2
With white yarn
Rnd 1: 6 sc into a double loop start and pull the loop closed (6).
Rnd 2: 2 sc in each sc around (12).
Rnd 3: [Sc in next sc, 2 sc in next sc] 6 times (18).
Rnd 4: [Sc in next 2 sc, 2 sc in next sc] 6 times (24).
Rnd 5: sc in each sc around (24).
Rnd 6: [Sc in next 10 sc, sc2tog] 2 times (22).
Rnd 7: [Sc in next 9 sc, sc2tog] 2 times (20).
Rnd 8: [Sc in next 8 sc, sc2tog] 2 times (18).
Switch to baby blue yarn
Rnd 9: sc in each sc around (18).
Rnd 10: [Sc in next sc, sc2tog] 6 times (12).
Rnds 11-25: sc in each sc around (12).
Finish off and secure end, leaving a 10” tail for sewing. Stuff with polyfil and sew an arm to each side of the hippo at neck level.

Legs: make 2
With white yarn
Rnd 1: 6 sc into a double loop start and pull the loop closed (6).
Rnd 2: 2 sc in each sc around (12).
Rnd 3: [Sc in next sc, 2 sc in next sc] 6 times (18).
Rnd 4: [Sc in next 2 sc, 2 sc in next sc] 6 times (24).
Rnd 5: [Sc in next 3 sc, 2 sc in next sc] 6 times (30).
Rnd 6: sc in each sc around (30).
Rnd 7: [Sc in next 13 sc, sc2tog] 2 times (28).
Rnd 8: [Sc in next 12 sc, sc2tog] 2 times (26).
Rnd 9: [Sc in next 11 sc, sc2tog] 2 times (24).
Switch to baby blue yarn
Rnd 10: [Sc in next 2 sc, sc2tog] 6 times (18).
Rnds 11-30: sc in each sc around (18).
Finish off and secure end, leaving a 10” tail for sewing. Stuff with polyfil and sew a leg to each side of the hippo at Rnd 10 of the body.

Ears:
Inner Ear: make 2
With white yarn, ch 2.
Row 1: 3 sc in 2nd ch from hook, ch 1, turn (3).
Row 2: 2 sc in each sc across, ch 1, turn (6).
Row 3: [sc in next sc, 2 sc in next sc] 3 times, ch 1, turn (9)
Change to baby blue yarn
Row 4: [sc in next 2 sc, 2 sc in next sc] 3 times (12).
Finish off, leaving 8 " tail for sewing.
Outer Ear: make 2
With baby blue yarn, ch 2.
Row 1: 3 sc in 2nd ch from hook, ch 1, turn (3).
Row 2: 2 sc in each sc across, ch 1, turn (6).
Row 3: [sc in next sc, 2 sc in next sc] 3 times, ch 1, turn (9).
Row 4: [sc in next 2 sc, 2 sc in next sc] 3 times (12).
Finish off but do not break yarn. Using yarn tail from inner ear and with right sides facing, sew inner ear and outer ear together around the outside edge of ears (but not the bottom).
Turn ear right side out. Ears are not stuffed. Sl st bottom of inner ear and outer ear
together and finish off leaving an 8’ tail for sewing. Making ear into a curved shape as you sew it on, sew each ear to top sides of head about 2” away from the top center of head.

Nose/Muzzle:
With baby blue yarn
Ch 9
Rnd 1: Sc in 2nd ch from hook and in next 6 ch, 2 sc in next
ch, working on the other side of the chain sc in next 7 ch, 2 sc
in next ch (18).
Rnd 2: [Sc in next 2 sc, 2 sc in next sc] 6 times (24).
Rnd 3: [Sc in next 3 sc, 2 sc in next sc] 6 times (30).
Rnd 4: [Sc in next 4 sc, 2 sc in next sc] 6 times (36).
Rnd 5: sc in each sc around (36).
Rnd 6: [Sc in next 5 sc, 2 sc in next sc] 6 times (42).
Rnds 7-10: sc in each sc around (42).
Rnd 11: [Sc in next 6 sc, 2 sc in next sc] 6 times (48).
Finish off leaving an 18” tail for sewing.
Using a sewing needle and dark brown embroidery floss, make nostrils on the muzzle as
shown in the picture. Sew the muzzle onto the head between Rnd 13 of head and the neck
about ¾ of the way around, stuff lightly with polyfil and continue to sew. Weave in ends.

Eyes:
Cut out 2 circles from dark brown felt about the size of a dime. Using a 6” strand of white embroidery floss, sew a “pupil” onto each felt circle. Using dark brown embroidery floss, sew the eyes onto the head as shown in the picture right above the muzzle.

Saturday, 25 August 2012

Summer Coming to an End

Well it is August 25th, in seven days it will be September. We all know what Semptember means, don't we? It means back to school or for some of you back to work with no more sunny holidays. Winter well soon be were so ther will be no more playing outside in the sun.

Even though the hot sun well be gone we crafters can have a up side. When you are knitting it warms you up. You may not be able to do it out side like you did in these last four months, but you can be in your house on a comfy arm chair, wrapped in a warm blanket, with a stiming cup of coco, and doing your favorite craft.

Even though Summer is coming to an end you can still look forward to all that and Christmas will come soon too. So you will have even more of a reason to craft. Because I always find that the best reason to craft is that you are making it for someone.

Monday, 16 July 2012

I Stitch Therefore I Stash Site


Sorry for the charts backgrounds being black. When I copied these thats how they turned out when I pasted them. I hope you can still read the square symbals. I hope you injoy these three charts.

This was designed by: Rhona Norrie


  Cross stitch in two strands

       Symbol                       DMC    Anchor   Madeira

1.       Upside down U   B5200     1           2401

2.       Diamond            208          99          804

3.       Black square      310         403        2400

4.       Black heart        321         9046      510

5.       Heart                  666         46          210

6.       Sun                     726        295         109

7.       Star                    727        293         112

8.       Black moon      798        137         912

9.       Black upside

down triangle   904      258        1413

10.   Upside down

triangle           906         256       1410

Backstitch in one strand

1.       Black line       310        403        2400

2.       Blue line         798       137        912

3.       Green line     904        258        1413

French knots in one strand

1.       Green dot     906        256        1410

Sunday, 15 July 2012

Time for Tea Teapots


                     DMC  Anchor     Madeira
Anchor
Sideways  S   151      733            404
Upside down
Triangle         164      240          1209
Blackened
Diamond       208     99             804
Outlined
Diamond      209     98            803
N                   210     108          802
A                   211     342          801
P                   340     118         902
t                   369     1043        1309
Blackened
Heart         603       55           701
Outlined
Heart        605       1094        613
Blackened
Upside down
Triangle     704      255         1308
$                728       305          107
Blackened e 742   303         114
e                   743    302        113
Star            745      300        111
Blackened
b                   783    306       2509
Blackened
Moon           798   137     912
Plain moon    799      145     910
C                    800    144     908
 3                   818     23      502
Sideways 9   912      209     1213
Arrow         988      243      1402
Circle with
Line          3607   87      708
 Black backward
R                 3731    76       506
Backward R   3733    75      605
b                 3746     1030    2702
I                    3823    386     2512
Backstitch in one strand
Purple line    208     99      804
Blue line       797     139     913
Green line    910     228    1302
Gray line      926      850    1707
Red line       3350    42       603
French knots in one strand
Yellow dot   743     302      113

Wednesday, 27 June 2012

Flower Jewellery Box


Symbols                      DMC          Anchor     Madeira
Coloured in heat        150              59                  508
Coloured in diamond    166           279                2703
Big N                               210            108                802
*                                     211             342               801
W                                   452             232              1807
Diamond                      472             253              1414
Coloured in star         601             63                 703
Box with top
right corner blackened    603       62                701
Big I                                    772         259            1604
Blackened arrow             920         1004          312
Outlined arrow                922          1003         2306
Outlined star                   963            73             502
Sideways S                     3761            928           1014
Outlined sun                  3825           1047          302
Sideways 9 with
head blackened            3844           1089          1102
Sideways 9                     3846           1090          1103

Backstitch with one strand
Red line                        150              59                508

French knots with one strand
Purple dot                   210               108              802

Mill Hill seed beads
Pink dot                    02018


Design used on 14-count fabric

Measurements
Clock-21.5 by 21.5cm (8 ½ by 8 1/2in)
Box- 10 by 10cm (4 by 4in)
Hanger- 5 by 15 (2 by 6in)

Thursday, 7 June 2012

Cup Cozy


I got this design from on of my favorite craft sites. Go to http://crafty-anna.blogspot.com/ she has everything. From free patterns to buying patterns. Like this or like some of the other ones I put up then go to her site.

Materi:als:Size F5 - 3.75 mm crochet hook
Worsted weight cotton yarn in green, tan and brown

Ch 11-With tan yarn:
Row 1: sc in 2nd ch from hook and in each ch across, ch 1, turn (10).

Row 2: hdc in next 7 sc, sc in next 3 sc, ch 1, turn (10).

Row 3: sc in next 4 sts, dc in next 6 sts, ch 1, turn (10).
Switch to brown yarn

Row 4: sc in each sc across, ch 1, turn (10).
Switch to tan yarn

Row 5: working in back loops only, hdc in next 7 sc, sc in next 3 sc, ch 1, turn (10).

Row 6: sc in next 4 sts, dc in next 6 sts, ch 1, turn (10).

Row 7: sc in next 6 sts, hdc in next 4 sts, ch 1, turn (10).
Switch to brown yarn

Row 8: sc in each st across, ch 1, turn (10).
Switch to tan yarn

Row 9: hdc in next 3 sc, dc in next 5 sc, hdc in next 2 sc, ch 1, turn (10).

Row 10: hdc in each st across, ch 1, turn (10).
Switch to brown yarn

Row 11: sc in next 4 sts, working in back rows only sc in next 6 sts, ch 1, turn (10).
Switch to tan yarn

Row 12: sc in each sc across, ch 1, turn (10).

Row 13: hdc in next 7 sc, sc in next 3 sc, ch 1, turn (10).

Row 14: sc in next 4 sts, dc in next 6 sts, ch 1, turn (10).
Switch to brown yarn

Row 15: sc in each sc across, ch 1, turn (10).
Switch to tan yarn

Row 16: working in front loops only, hdc in next 7 sc, sc in next 3 sc, ch 1, turn (10).

Row 17: sc in next 4 sts, dc in next 6 sts, ch 1, turn (10).

Row 18: sc in next 6 sts, hdc in next 4 sts, ch 1, turn (10).
Switch to brown yarn

Row 19: sc in each st across, ch 1, turn (10).
Switch to tan yarn

Row 20: hdc in next 3 sc, dc in next 5 sc, hdc in next 2 sc, ch 1, turn (10).

Row 21: hdc in each st across, ch 1, turn (10).
Switch to brown yarn

Row 22: sc in each st across, ch 2, turn (10).
Switch to tan yarn

Row 23: dc in next 6 sts, hdc in next 2 sts, sc in next 2 sts, ch 1, turn (10).

Row 24: sc in next 4 sts, hdc in next 6 sts, ch 1, turn (10).
Switch to brown yarn

Row 25: sc in each sc across, ch 1, turn (10).
Switch to tan yarn

Row 26: sc in next 6 sts, hdc in next 4 sts, ch 2, turn (10).

Row 27: dc in next 3 sts, hdc in next 2 sts, sc in next 5 sts, ch 1, turn (10).
Switch to brown yarn

Row 28: sc in each st across (10).
Finish off leaving a 12” tail for sewing and sew Row 1 to Row 28. Weave in ends.

Leaves:
Ch 9-
Sc in 2nd ch from hook, dc in next 3 ch, sc in next 2 sc, sl st in next 2 ch, working in the free loops on the other side of the chain, sl st in next ch, sc in next 2 ch, dc in next 3 ch, sc in last ch.

Finish off leaving a long tail for sewing and sew to cup sleeve.

Ch 7-
Sc in 2nd ch from hook, dc in next 2 ch, sc in next 2 sc, sl st in next ch, working in the free loops on the other side of the chain, sc in next 2 ch, dc in next 2 ch, sc in last ch.

Finish off leaving a long tail for sewing and sew to cup sleeve.

Sunday, 3 June 2012

Great Craft Sites

As you already now I loving almost every kind of craft. And with loving crafts so much you got to know the right sites to go to. I myself have four sites that are great for craft people a great for meeting other crafters.
First off if you want to find knitting patterns I think you should go to www.KnittingPatternCentral.com for it has everything on knitting and 100's of knitting patterns. From Bags, Totes and Purses to Barbie Fashion. If you don't knit though, but have a pasion for crochet then you would love www.CrochetPatternCentral.com . You can find all kinds of patterns, just as many as you would find in Knitting Pattern Central.
My two last sites are mostly for talking. The first one is www.craftbubble.com which is just a wonderful site. You can meet so many people all over the world that like crafts just as much as you do. So if you want to meet new friends then sing up. If you already are then hay look up youngcrafter and add me to your friends list.
My next one is www.ravelry.com where you can put down your projects your working on and say how far you are. You basicly take about and do things that involve your projects, but it is still fun to go on sometimes.

Friday, 11 May 2012

Mother's Day

The day that mothers wait all year around for is coming up in two days. Oh no you say, we'll then you must be that one kid in your family that always forgets. No, you say. Well you must be the other one that wants to get your mother something that she will treasure, keep, and use forever. Well all mothers love nothing more then something that was made by none other then by your hands and love. Thats why knowing how to crochet, knit, cross stitch, or even card making comes in hand when mothers day comes around the corner.
Me I am making my mom a card with a cross stitch picture on the front. It's Fizzy Moon Mothers Day kit people!

Thursday, 3 May 2012

Started

In case you do not know I got I sewing machine for my birthday. Well just last week mom took me out shoping for fabric and a patteren. We got three different kinds of fabric and a McCall's dress pateren with four different dresses. Anyway this week I started iroining, pining, and cutting. I am almost done cutting out the fabric, I maybe woud have been started with the sewing but enstead I had to take the time cutting out the patteren, which I just hate and so does my mom.

Saturday, 18 February 2012

Double Basket Stitch

Row 1- k12.
Row 2- p5, k1, p5, k1.
Row 3- k12.
Row 4- p5, k1, p5, k1.
Row 5- k12.
Row 6- p2, k1, p5, k1, p3.
Row 7- k12.
Row 8- p2, k1, p5, k1, p3.
Row 9- repeat row 1-8 to get patern.

Basket Stitch

Row 1- k3, p3, k3.
Row 2- k3, p3, k3.
Row 3- p3, k3, p3.
Row 4- p3, k3, p3.
Row 5- Continue row1-4 untill your project is completed.

Friday, 3 February 2012

Sorry

I'd like to say that I am sorry to all of the people that own the sites that I have taken patterns from to put on my blog.
I am sorry to Naida who I got the "Be My Valentine Scarf."
I am sorry to Tez who sent me an email telling me she was unset at the fact that I did not get permission to put others patters on.
If there is anyone else that is upsite because I have taken your pattern then please write a coment on this post with your name, your complent, name of the pattern, and name of your site it was from.

Monday, 30 January 2012

Baby Buzzy Bee


I got this pattern from http://crafty-anna.blogspot.com/. So go to her blog to get more cool patterns just like this.
Materials:- Crochet hook E4 / 3.5 mm
- Worsted weight acrylic yarn in yellow, black and white
- Polyester fiberfill
- 6mm black safety eyes
- Yarn needle
- Sewing needle
- Black pipe cleaner

Bee: With yellow yarnRnd 1: 6 sc into a double loop start and pull the loop closed (6).
Rnd 2: 2 sc in each sc around (12).
Rnd 3: [Sc in next 3 sc, 2 sc in next sc] 3 times (15).
Rnd 4: [Sc in next 4 sc, 2 sc in next sc] 3 times (18).
Rnd 5: [Sc in next 5 sc, 2 sc in next sc] 3 times (21).
Rnd 6: [Sc in next 6 sc, 2 sc in next sc] 3 times (24).
Switch to black yarn
Rnds 7-8: sc in each sc around (24).
Pause to attach eyes between Rnds 3 and 4.
Using a length of black yarn split down to 2 ply and a sewing needle, stitch mouth onto Rnd 1.
To make antennea, cut a black pipe cleaner in half. Cut a length of black yarn and tie and knot it around the center of a piece of black pipe cleaner a few times. This will create a little ball at the tip of the antennea. Bend the pipe cleaner in half and insert the ends into the bee's head between Rnds 5 and 6. Leave about 1"-1.5" of the antennea sticking out of the bee's head. With the pipe cleaner that is inside the bee's body, bend the two pieces at a 90 degree angle to anchor the antennea in place. For added strength, you may want to stitch the pipe cleaner "tails" to the bee's body using a length of yellow yarn. Repeat with other half of the pipe cleaner for the other antennea.
Switch to yellow yarn
Rnds 9-10: sc in each sc around (24).
Switch to black yarn
Rnd 11: sc in each sc around (24).
Rnd 12: [sc in next 2 sc, sc2tog] 6 times (18).
Switch to yellow yarn
Rnd 13: sc in each sc around (18). Stuff.
Rnd 14: [sc in next sc, sc2tog] 6 times (12).
Switch to black yarn
Rnd 15: [sc in next 2 sc, sc2tog] 3 times (9).
Rnd 16: [sc in next sc, sc2tog] 3 times (6).
Finish off leaving a 6" tail. Weave tail through remaining 6 sc and pull up firmly to close the hole. Weave in ends.
Wings: With white yarnRnd 1: 6 sc into an adjustable ring and pull the ring closed.
Rnd 2: 2 sc in next sc, 2 hdc in next sc, 2dc in next 2 sc, 2 hdc in next sc, 2 sc in next sc (12).
Rnd 3: [sc in next st, 2 sc in next st] 2 times, hdc in next st, 2 dc in next st, dc in next st, dc and hdc in next st, [sc in next st, 2 sc in next st] 2 times (18).
Finish off leaving a tail for sewing. Sew wings to bee. Weave in ends.

Friday, 27 January 2012

Moss Stitch

This pattern is very easy perfect for beginner's.

Row 1: k1, p1 all the way across.

Row 2: k1, p1 all the way across.

Row 3: p1, k1 all the way across.

Row 4: p1, k1 all the way across.

Now repeat rows 1-4 to get the pattern.

Monday, 23 January 2012

Leg Warmers


 I got this pattern from http://www.knitting-crochet.com/
I hope you like it even if the picture is in black and white. Don't let that make you think that leg warmers are totally cool and they keep your legs warm.

Row 1: Sc in each ch, join with sl st in top of ch-2, ch 2, do not turn.

Rows 2 through 8: Repeat Row 1.

Row 9: With larger hook, ch 2, hdc in each sc across, join with sl st in top of ch-2, ch 2, turn.

Repeat Row 9 to length desired, after last sl st, fasten off

Happy Colored Pencils


I got this pattern from http://crafty-anna.blogspot.com/. Go to her site she has much more funny crochet items that are simple to make


Materials:
- crochet hook size E/4 - 3.5 mm
- worsted weight acrylic yarn in pink, light grey, hot pink, red, orange, yellow, green, turquoise, blue, purple and beige
- black embroidery floss or black yarn split down to 2 ply
- stuffing
- needle
- 6mm black safety eyes


Rnd 1: 6 sc into an adjustable ring and pull the ring closed(6).

Rnd 2: 2 sc in each sc around (12).

Rnd 3: [sc in next sc, 2sc in next sc] 6 times (18).

Rnd 4: working in back loops only, sc in each sc around (18).

Rnds 5-7: sc in each sc around (18).
Switch to light grey yarn

Rnd 8: sc in each sc around (18).

Rnd 9: working in back loops only, sc in each sc around (18).
Switch to hot pink, red, orange, yellow, green, turquoise, blue or purple yarn

Rnd 10: working in back loops only, sc in each sc around (18).

Rnds 11-18: sc in each sc around (18).
Pause crocheting to attach safety eyes and stitch on mouth using black yarn.
Switch to beige yarn

Rnd 19: sc in each sc around (18).

Rnd 20: [sc in next sc, s2ctog] 6 times (12). Stuff pencil and continue to stuff as you work from now on.

Rnd 21: sc in each sc around (12).

Rnd 22: [sc in next 2 sc, sc2tog] 3 times(9).
Switch to hot pink, red, orange, yellow, green, turquoise, blue or purple yarn

Rnd 23: [sc in next sc, sc2tog] 3 times (6).

Rnd 24: [sc2tog] 3 times (3).
Finish off leaving a 6" tail. Weave tail through remaining 6 sc and pull up firmly to close the hole. Weave in ends.

Saturday, 21 January 2012

Huney Pot and Wooden Dipper


I got this pattern from http://crafty-anna.blogspot.com/ so go see her site if you like this pattern as much as I do.

Materials:
Crochet hook size E/4
Worsted weight acrylic yarn in tan, yellow and black
Tapestry / yarn needle
Polyester stuffing
White felt
DMC/embroidery floss in black and white
Sewing needle
* Optional – pinking shears for crinkled edge around label.

You’ll need to know how to do these stitches:
Chain (ch)
Double loop start
Single crochet (sc)
Single crochet together/ decrease

Honey Pot
Outer shell: with yellow yarn
Rnd 1: 6 sc into a double loop start and pull the loop closed (6).
Rnd 2: 2 sc in each sc around (12).
Rnd 3: [Sc in next sc, 2 sc in next sc] 6 times (18).
Rnd 4: [Sc in next 2 sc, 2 sc in next sc] 6 times (24).
Rnd 5: [Sc in next 3 sc, 2 sc in next sc] 6 times (30).
Rnd 6: [Sc in next 4 sc, 2 sc in next sc] 6 times (36).
Rnd 7: working in back loops only, [Sc in next 5 sc, 2 sc in next sc] 6 times (42).
Rnds 8-16: sc in each sc around (42).
Rnd 17: [Sc in next 5 sc, sc2tog] 6 times (36).
Rnd 18: sc in each sc around (36).
Rnd 19: sl st in each sc around (36).
Finish off.

Inner shell:
Rnd 1: 6 sc into a double loop start and pull the loop closed (6).
Rnd 2: 2 sc in each sc around (12).
Rnd 3: [Sc in next sc, 2 sc in next sc] 6 times (18).
Rnd 4: [Sc in next 2 sc, 2 sc in next sc] 6 times (24).
Rnd 5: [Sc in next 3 sc, 2 sc in next sc] 6 times (30).
Rnd 6: [1 sc in next 2 sc, 2 sc in next sc] 10 times (40).
Rnds 7-13: sc in each sc around (40).
Rnd 14: [1 sc in next 2 sc, sc2tog] 10 times (30).
Finish off leaving a 12" tail for sewing.

Label:
Cut a piece of white felt that is approximately 3” by 2” (I used pinking shears to get the crinkled edge). Using black DMC/embroidery floss and a sewing needle, stitch the word “Honey” onto the felt as shown in the picture. Stitch the label onto the outer shell using a 12” length of white DMC/embroidery floss and a sewing needle.

Insert inner shell into outer shell. Using a length of yellow yarn and a yarn/tapestry needle, tack the bottom center of the inner shell to the bottom center of the outer shell. Using the tail you finished the inner shell with and a tapestry needle, sew Rnd 14 of inner shell to Rnd 17 of outer shell. Weave in ends.

Lid: With black yarn
Rnd 1: 6 sc into a double loop start and pull the loop closed (6).
Rnd 2: 2 sc in each sc around (12).
Rnd 3: [Sc in next sc, 2 sc in next sc] 6 times (18).
Rnd 4: [Sc in next 2 sc, 2 sc in next sc] 6 times (24).
Rnd 5: [Sc in next 3 sc, 2 sc in next sc] 6 times (30).
Rnd 6: [Sc in next 4 sc, 2 sc in next sc] 6 times (36).
Rnd 7: [Sc in next 5 sc, 2 sc in next sc] 6 times (42).
Rnd 8: sl st in each sc around (42).


Knob: With black yarn
Rnd 1: 6 sc into a double loop start and pull the loop closed (6).
Rnd 2: [1 sc in next sc, 2 sc in next sc] 3 times (9).
Rnd 3: [1 sc in next sc, sc2tog] 3 times (6).
Finish off leaving a 12" tail. Weave tail through remaining 6 sts and pull up firmly to close hole. Sew to top center of lid. Weave in ends.

Lip: With black yarn
ch 30, join to first ch with a sl st to form a loop.
Sc in each ch around.
Finish off leaving a 12" tail for sewing.
Sew top edge of lip around the underside of lid at Rnd 5. This will create a “lip” that will extend approx ½” from the bottom of the lid that will fit inside the honey pot when the lid is put on the pot.

End cap: With black yarn
Rnd 1: 6 sc into a double loop start and pull the loop closed (6).
Rnd 2: 2 sc in each sc around (12).
Rnd 3: [Sc in next sc, 2 sc in next sc] 6 times (18).
Rnd 4: [Sc in next 2 sc, 2 sc in next sc] 6 times (24).
Rnd 5: [Sc in next 3 sc, 2 sc in next sc] 6 times (30).
Finish off leaving a 12" tail for sewing. Sew cap to lip about 3/4 of the way around, stuff lightly with polyfil and continue to sew closed. Weave in ends.

Dripper: With tan yarn
Rnd 1: 6 sc into a double loop start and pull the loop closed (6).
Rnd 2: 2 sc in each sc around (12).
Rnd 3: [Sc in next sc, 2 sc in next sc] 6 times (18).
Rnd 4: Sc in each sc around (18).
Rnd 5: [Sc in next 5 sc, 2 sc in next sc] 3 times (21).
Rnd 6: [Sc in next 5 sc, sc2tog] 3 times (18).
Rnd 7: Sc in each sc around (18).
Rnd 8: [Sc in next sc, sc2tog] 6 times (12).
Rnd 9: Sc in each sc around (12). Stuff.
Rnd 10: [sc2tog] 6 times (6).
Rnds 11-22: Sc in each sc around (6).
Finish off leaving a 6” tail. Stuff handle. Weave tail through remaining 6 sts and pull up firmly to close hole. Weave in ends.

Two Great Sites

   Yesterday a friend told me about these great sites were you can find free patterns. Will when I was at home I went to go see for myself and lucky me I found them and she was right. The first site is for Knitting patterns. It's called Knitting Pattern Central.com. Now the next one I really don't need to tell you because you have prabable already guesses, but any way it's for crocheting. Now the site name I think you already now, but I'll still tell you Crochet Pattern Central.com. So if your looking for more free crochet patterns or free knitting patterns then go check out those sites. I have and I love them.  

Friday, 20 January 2012

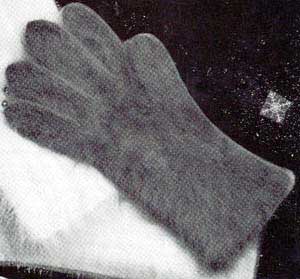
Women's Angora Gloves


I got this glove pattern from Free Vintage knitting so if you like vintage things then go there to find more free knitting patterns.
Medium Size

MATERIALS: Fleisher’s or Bucilla Imported Featherlite French Angora, 3, 10 gram balls.
“Boye” Sock Needles, 1 set Size 1.

GAUGE: 17 sts = 2 inches

RIGHT GLOVE: Cast on 56 sts; divide on 3 needles, join. K 5 rounds even. P 1 round for turning ridge. K even until 2 ins. from turning ridge, mark end of rounds.

Hand: First inc. round: Inc. 1 st in first st, k 1, inc. 1 st in next st (5 sts in thumb gore), k to end of round. K 3 rounds even.

2nd inc. round: Inc. 1 st in first st, k 3, inc. 1 st in next st, k to end of round. Continue to inc. 1 st each side of thumb gore every 4th round having 2 sts more between incs. after each successive inc. round until 17 sts in thumb gore. K 2 rounds even, end just before first thumb st. Slip next 17 sts to a strand of yarn for thumb. Cast on 6 sts, mark for end of round; 59 sts. K 1 ½ ins. even.

First Finger: Slip first 43 sts of next round to a thread to be held for next 3 fingers; cast on 5 sts for gusset. Divide these 21 sts on 3 needles, join. K around for 2 ¼ ins.

First dec. round: K 2 tog., k to end of round; 20 sts. K 1 round even.

2nd dec. round: * K 3, k 2 tog.; repeat from * to end of round; 16 sts. K 1 round.

3rd dec. round: * K 2, k 2 tog.; repeat from * to end of round; 12 sts. K 1 round.

4th dec. round: K 2 tog. 6 times; break off leaving an end. Draw end through all 6 sts; fasten off.

Second Finger: Slip 7 sts from thread on back of hand to needle, pick up and k 5 sts on the 5 sts of gusset, k 7 sts from palm of hand to needle, cast on 4 sts for gusset. Divide these 23 sts on 3 needles, join. K around for 2 ½ ins.

First dec. round: Dec. 3 sts evenly spaced around; 20 sts. K 1 round. Finish same as first finger.

Third Finger: Slip 7 sts from back of hand to needle, pick up and k 4 sts on the 4 cast-on sts of 2nd finger, k 7 sts from palm of hand to needle, cast on 3 sts for gusset. Divide these 21 sts on 3 needles, join. K around for 2 ¼ ins. Finish same as first finger.

Fourth Finger: Slip remaining 15 sts to 2 needles, pick up and k 3 sts on the 3 cast-on sts. Divide these 18 sts on 3 needles, join. K around for 1 ¾ ins.

First dec. round: K 2 tog., k 7, k 2 tog., k 7; 16 sts. Work 1 round even. Beg. with 3rd dec. round, finish same as first finger.

Thumb: Slip the 17 thumb sts to 2 needles, pick up and k 8 sts on the 6 cast-on sts. Divide these 25 sts on 3 needles, join. K 2 rounds even.

Next round: K 2 tog. at center of sts picked up. K 1 round even. On next round, dec. 1 st above last dec.; 23 sts. K around until 2 ins. from picked up sts. Finish same as 2nd finger. Turn up hem and sew to wrong side.

LEFT GLOVE: Work same as right glove up to first finger, end k to within 6 sts of end of last round. Slip last 43 sts worked to a thread.

First Finger: K next 16 sts, cast on 5 sts for gusset. Finish left glove to correspond to right.

Mom's Crystal Star Doily

I do not have the picture for this crochet doily, but I can tell you that it was very nice.

Copyright © 2001 by James G. Davis AND Vicki Tillett. I got this pattern from http://pandacrochet.8m.com/ please go to her site to see more free crochet patterns
Materials:
Approx. 75 yds size 10 crochet thread; size 6 (1.8mm) steel hook OR Size Needed for Gauge
.
Gauge:
Rnds 1 & 2 = 1½" across from "corner" to "corner"
.
Finished Size:
Approx. 8¼" in diameter (at widest points) after blocking
.
Special Stitches:
-Beginning Shell (beg shl) - sl st to next ch sp, (ch 3, dc, ch 2, 2 dc) in same ch sp
-Shell (shl) - (2 dc, ch 2, 2 dc) in ch sp indicated
-Shell in Shell (shl in shl) - work Shell in ch-2 sp of next Shell
.
.
NOTE:
RND 4 may cause doily to "cup" slightly, but it will lay flat again once
RNDS 5 & 6 are complete.
.
Begin with ch 6, join with sl st in first ch to form ring.
.
RND 1: ch 3 (counts as first dc, now and throughout), dc in ring, ch 2, (2 dc in ring, ch 2) 5 times, join with sl st in top of beg ch-3.  (12 dc, 6 ch-2 sps)
Note: next 9 Rnds will be joined the same as RND 1.
.
RND 2: beg shl, ch 1, (shl in next ch-2 sp, ch 1) 5 times, join.  (6 shls, 6 ch-1 sps)
.
RND 3: beg shl, ch 3, (shl in shl, ch 3) 5 times, join.  (6 shls, 6 ch-3 sps)
.
RND 4: beg shl, *ch 2, dc in ch-3 sp, ch 2**, shl in shl*, rep from * to * around ending last rep at **, join.  (6 shls, 6 dc, 12 ch-2 sps)
.
RND 5: beg shl, *ch 3, dc in ch-2 sp, dc in dc, dc in ch-2 sp, ch 3**, shl in shl*, rep from * to * around ending last rep at **, join.  (6 shls, 12 ch-3 sps, 18 dc)
.
RND 6: beg shl, *ch 3, 2 dc in ch-3 sp, dc in dc, ch 1, sk next dc, dc in next dc, 2 dc in ch-3 sp, ch 3**, shl in shl*, rep from * to * around ending last rep at **, join.  (6 shls, 6 ch-1 sps, 12 ch-3 sps, 36 dc)
.
RND 7: beg shl, *ch 3, 2 dc in ch-3 sp, dc in dc, ch 2, sk next 2 dc, dc in ch-1 sp, ch 2, sk next 2 dc, dc in next dc, 2 dc in ch-3 sp, ch 3**, shl in shl*, rep from * to * around ending last rep at **, join.  (6 shls, 12 ch-2 sps, 12 ch-3 sps, 42 dc)
.
RND 8: beg shl, *ch 3, 2 dc in ch-3 sp, dc in dc, ch 3, sk next 2 dc, dc in ch-2 sp, dc in dc, dc in ch-2 sp, ch 3, sk next 2 dc, dc in next dc, 2 dc in ch-3 sp, ch 3**, shl in shl*, rep from * to * around ending last rep at **, join.  (6 shls, 24 ch-3 sps, 54 dc)
.
RND 9: beg shl, *ch 3, 2 dc in ch-3 sp, dc in dc, ch 3, sk next 2 dc, dc in ch-3 sp, dc in next 3 dc, dc in ch-3 sp, ch 3, sk next 2 dc, dc in next dc, 2 dc in ch-3 sp, ch 3**, shl in shl*, rep from * to * around ending last rep at **, join.  (6 shls, 24 ch-3 sps, 66 dc)
.
RND 10: sl st in next dc and into ch-2 sp, (ch 3, dc, ch 3, 2 dc) in same sp beg Corner made), *ch 3, 2 dc in ch-3 sp, dc in dc, ch 3, sk next 2 dc, dc in ch-3 sp, dc in next 5 dc, dc in ch-3 sp, ch 3, sk next 2 dc, dc in next dc, 2 dc in ch-3 sp, ch 3**, (2 dc, ch 3, 2 dc) in next shl (Corner made)*, rep from * to * around ending last rep at **, join.  (30 ch-3 sps, 102 dc)  Do Not Fasten Off.  Continue with Rnd 11 below.

Special Stitch:
-Decrease (dec) - yo, (insert hook in next dc, draw up loop) 2 times, yo and draw through 3 loops, yo and draw through last 2 loops (counts as 1 dc)
.
NOTE:
Rnds 13 & 14 may tend to cause doily to "cup" slightly, but it will lay flat again when Rnd 15 is complete.
.
RND 11: sl st in next dc and into corner ch-3 sp, ch 3 (counts as first dc), 5 dc in same sp, *ch 3, skip next ch-3 sp and next 2 dc, dc in next dc, 2 dc in ch-3 sp, ch 3, sk next dc, dc in next 2 dc, dec, dc in next 2 dc, ch 3, 2 dc in ch-3 space, dc in next dc, ch 3, skip next 2 dc and ch-3 space**, 6 dc in corner ch-3 sp*, rep from * to * around ending last rep at **, join with sl st in top of beg ch-3. (102 dc, 24 ch-3 sps)
.
RND 12: sl st in next dc, ch 3 (counts as first dc), dc in same dc, 2dc in each of next 4 dc, *ch 3, sk next ch-3 sp and next 2 dc, dc in next dc, 2 dc in next ch-3 sp, ch 3, sk next dc, dc in next dc, dec, dc in next dc, ch 3, 2 dc in ch-3 sp, dc in next dc, ch 3, sk next 2 dc and ch-3 sp and next dc**, 2 dc in each of next 5 dc*, rep from * to * around ending last rep at **, join with sl st in top of beg ch-3. (114 dc, 24 ch-3 sps)
.
RND 13: sl st in next dc, ch 4 (counts as first dc and 1 ch), (dc in next dc, ch 1) 7 times, dc in next dc, *ch 3, sk ch-3 sp and next 2 dc, dc in next dc, 2 dc in ch-3 sp, ch 3, sk next dc, dec, ch 3, 2 dc in ch-3 sp, dc in next dc, ch 3, sk next 2 dc and ch-3 sp and next dc**, (dc in next dc, ch 1) 8 times, dc in next dc*, rep from * to * around ending last rep at **, join with sl st in 3rd ch of beg ch-4. (96 dc, 24 ch-3 sps, 48 ch-1 sps)
.
RND 14: sl st into ch-1 sp, ch 5 (counts as first dc and 2 ch), (dc in next ch-1 sp, ch 2) 6 times, dc in next ch-1 sp, *ch 3, sk ch-3 sp and next 2 dc, dc in next dc, 2 dc in ch-3 sp, ch 3, 2 dc in next ch-3 sp, dc in next dc, ch 3, skip next 2 dc and ch-3 sp**, dc in next ch-1 sp, (ch 2, dc in next ch-1 sp) 7 times*, rep from * to * around ending last rep at **, join with sl st in 3rd ch of beg ch-5. (84 dc, 18 ch-3 sps, 42 ch-2 sps)
.
RND 15: sl st into ch-2 sp, ch 1, *[(sc, 2 dc, sc) in ch-2 sp] 7 times, 3 sc in ch-3 sp, sc in each of next 3 dc, ch 1, 3 dc in ch-3 sp, ch 1, sc in each of next 3 dc, 3 sc in ch-3 sp*, rep from * to * around, join with sl st in top of first sc. (156 sc, 102 dc)  Fasten Off.  Weave in ends.
.